How to replace modern doorknobs with antique doorknobs
A commonly asked question here in Hippo land is "How do I put beautiful antique hardware on my modern doors?" To support antique hardware lovers everywhere, we'd like to offer you a step by step guide to replacing your unwanted modern hardware with stunning antiques!
What you'll need:
1) A tube latch with face plate and strike (1)
2) Door plates (2)
3) Doorknobs (2)
Step 1: Take off all your existing hardware.
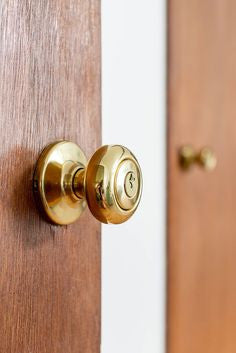
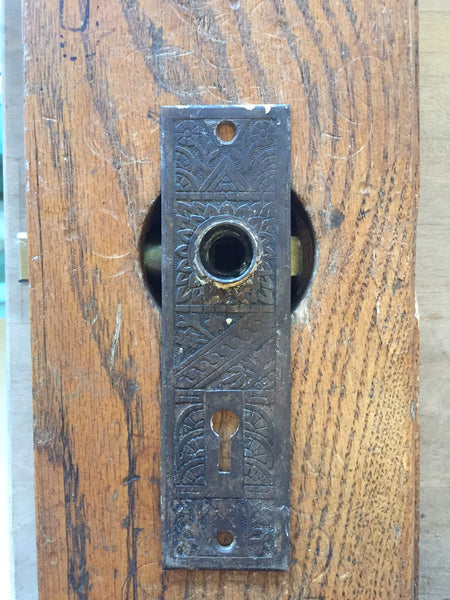
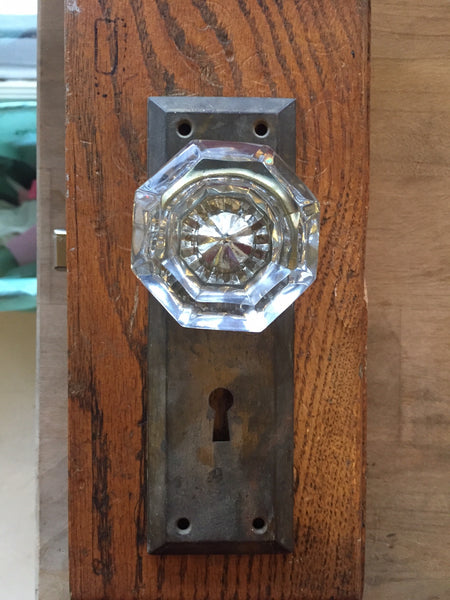
We're assuming at this stage that you have something that looks kinda like this:
How to disassemble is different for most manufacturers. Usually you need to look for some kind of 'pin' or set screw in the shaft of the doorknob to start. Some have an actual screw, some have a thin wire that needs to be pressed down, and some have a small hole that needs to be depressed with a screw driver. Some of them are really not very obvious and you might need to google search some instructions based on your knobs.
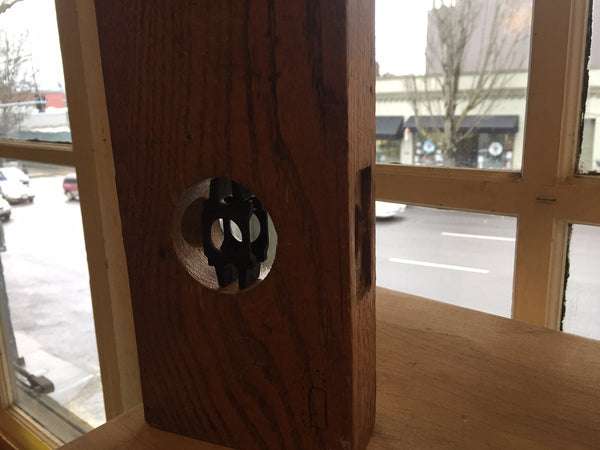
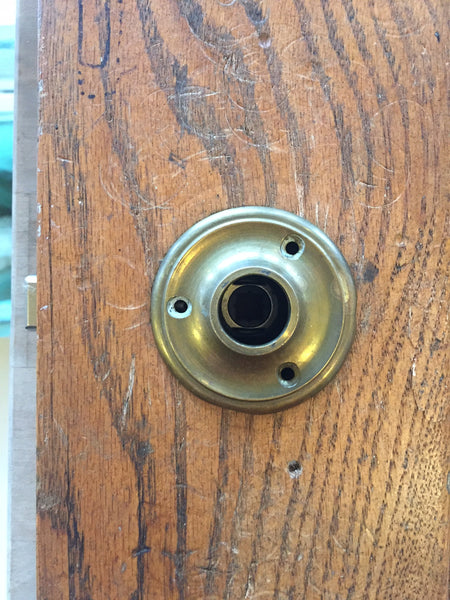
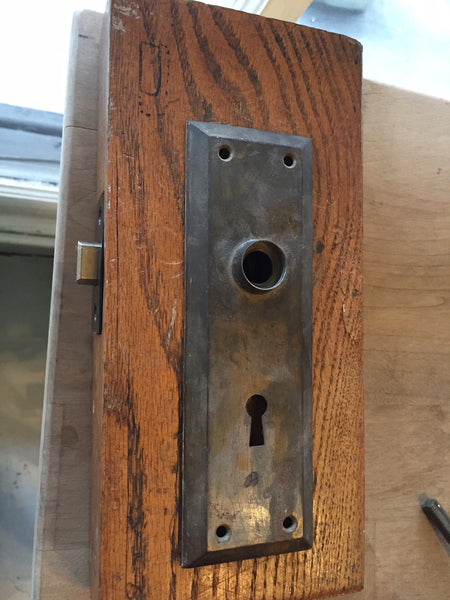
At the end, you should have a naked door that looks like this:

(Note - it's more likely the large center hole does not have divet in the back. This will be of no importance either way)
Step 2: Install a Tube Latch
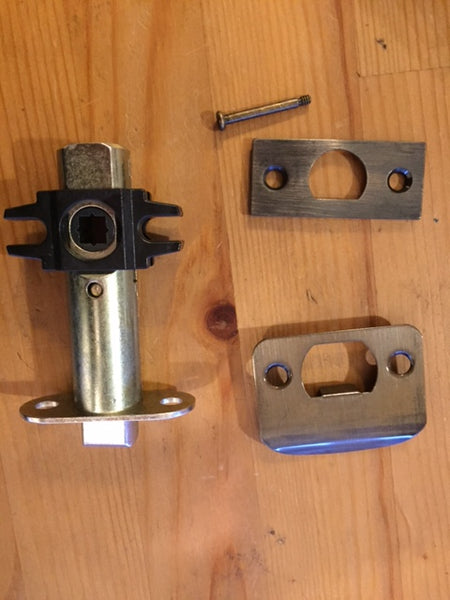
First we start with a reproduction tube latch. A new tube latch will get you all these parts: A tube latch body, a face plate, a plastic spacer, and a strike plate. The pin won't be needed! Antique tube latches are also great and normally have a face plate already integrated.
The bonus of the separate face plate is the plunger can rotate to either side before securing the face plate, allowing the door to swing either way. Some antique tube latches can also rotate the plunger, but usually require opening them up. It's a great thing to explore if you're adventurous- but be careful to not lose parts and take a picture of the guts before you start pulling things out!
First, we take the black spacer and put it into the hole. This part will keep your tube latch aligned in the center of the hole:
 Next, put the tube latch through the hole in the narrow edge of the door and through the space, like this:

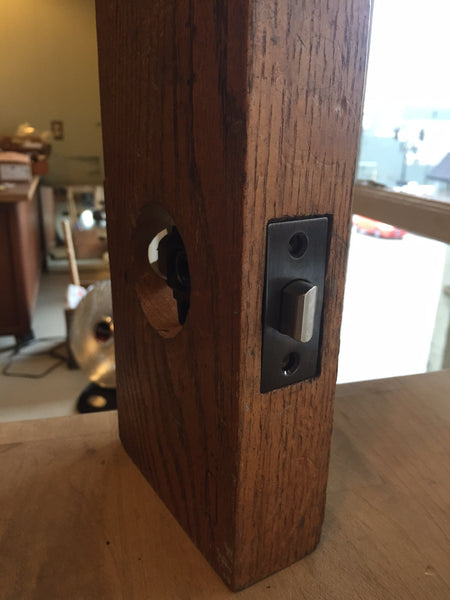
Now you can rotate the plunger so the face of the plunger slopes towards the jamb of the door, or to where the strike will be. Think of it like if you threw the door closed behind you, you'd want the latch to hit the strike and slide up it until the door clicked closed. Once you have the plunger facing the correct direction, put the face plate over and screw it down:
Now is a great time to replace the strike if you need to. Make sure the latch lines up with the hole in the strike. You may already have a perfectly serviceable strike from your previous hardware.
Step 3: Install your plates
Next come the plates. Here is the biggest limitation when you have the large 2 1/8" hole - it's too wide for many antique plates to cover. It could be drastic like this guy:
Or less noticeable but still peaking out like this one:

Rosettes can be some of the trickiest because it looks like a perfect fit... until you realize that the screw holes are over the hole too and there's no easy way to attach it (we really don't recommend glue). There are tricky ways around this if you want to get long machine screws but it's a bit of work.
As long as the plate can attach to the door, the gap is aesthetic. If it doesn't bother you, there's nothing to stop you from using a plate that's too small to cover the hole. Most our customers don't like it and end up looking for a plate that is:
a) wide enough
b) has the screw holes over the wood to attach
A third option are reproduction rosettes that screw together. They're nice because you can get the antique rosette size without having to fill your door:

Yet another option are these reproduction rosettes that are an impressive 3" in diameter, leaving enough space to screw them directly into the wood:

For our example, we will use a lovely original 1915 craftsman door plate. The plate should be lined up with the hole in the plate for the doorknob over the hole in the latch:
and a detail of the alignment:

We normally wait to screw in the plate until the knobs have been installed. That way you can make sure the knobs are moving completely freely before screwing the plates down. The knobs are frequently snugly nested into the plate so even a slight lift or lower of the plate can cause the knobs to rub.
Step 4: Install Doorknobs
Next it's time for the knobs. Really, you can use any antique knobs with a spindle that you'd like. For this example, we're going to use a classic 1920's pair of octagonal glass knobs with a threaded spindle:
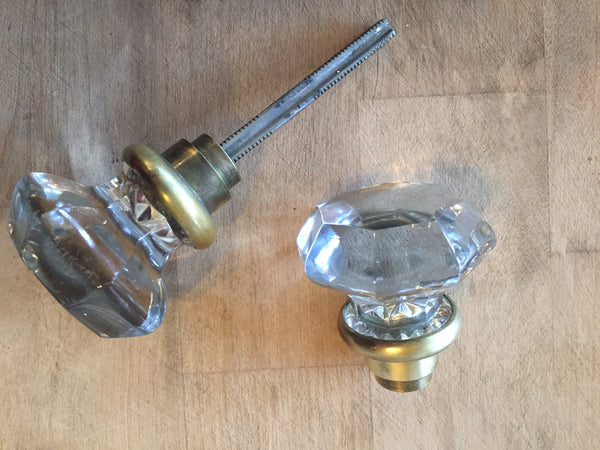
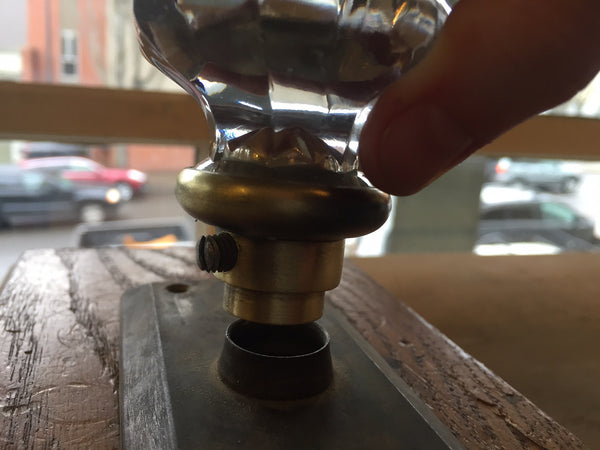
Take off one knob from the spindle which will involved loosening or removing the set screw in the collar and unscrewing it from the spindle. (Note - a straight shaft (non-threaded) knob set will also work but will come apart differently.)
Take the knob with the spindle attached and slide it through the door - both plates and the tube latch.
It's nice for alignment when the knobs nest into the plate bezel, like this:

It's not strictly necessary. Your knob can sit on top of the plate bezel but it's how the pieces were intended to function and it keeps the knobs from wobbling.
Once the first knob is through, re-attach the second knob so that it fits snugly but still moves freely. With threaded knobs, you'll have to experiment with the right placement although be sure to avoid putting the set screw down on the corner of the spindle. It will likely give way pretty quickly and your knob will start slipping. For straight shaft knobs, getting spacing right will usually involved getting actual spacers as the knobs are in fixed locations on the spindle.
Step 5: Screw Door Plates in Place
Once everything's in the right spot, make sure the knobs are sitting exactly perpendicular to the door and screw down the plates! All finished and looking good my friend!
Next →
← Previous
15 Responses
Will
How about hollow doors? We moved from an 1870s house to a 1970s one with hollow core doors and brought all the antique doorknobs we had collected but can’t figure out how to install them. Any ideas?
Rhiannon Webb
I have several antique knobs in my house. Do you have any advice on restoring them to their former beauty? Also the bathroom door does not lock, it originally had a skeleton key, we didn’t get when we purchased the home. Any advice on how to get a key or the door to lock? Thank you.
Mike brooks
Can the old hardware be put into new hallow core doors
dave
I have a question about the spindles: are they all the same size? Will any spindle work with the tube latch? Or are some spindles too narrow or too wide?
thanks!
Theresa
How would you go about setting up one that locks from the inside? ( for a bathroom)
amy
Hi!
We have knobs with 3-hole rosettes exactly like you show in your first rosette photo, and they don’t come off. You mention the “tricky ways with long machine screws” but then don’t give details. Would you mind elaborating? The rosettes cover the holes, but every adaptor we’ve found takes two screws, not three. Is there a solution? Thanks!
Jo gavin
My problem is that I’m putting some Victorian door finger plates onto my modern doors, but I don’t know what screws to use. I can ‘t use modern screws as it just looks awful. I notice in pictures of the reproduction door plates that the ‘screw’ has a solid covering over the top – if you get my meaning? Trying to explain is tricky. Does anyone know where to get this kind of thing?
Jillian Fisher
Hi – I have used three of these so far and just ordered another two for the doors in my 1865 house. We bought old knobs for the few newer doors and these worked like a charm!
Just want to add that we also had that sizeable gap where the previous knobhole was, we filled it with putty around the edges once the tube was inside and then sanded/painted and it looks fantastic.
Thanks!!
James
Very helpful info here. Thanks
Andrew
Do the doors lock using this method?
Hippo Hardware
Hi Karen! Thanks! We hope they’re helpful.
Hippo Hardware
Hi Allie,
If the plate is too small, there isn’t a clear way to cover the gap aside from some very MacGyver-y moves like filling in the wood hole or getting some sheet brass. We’d recommend finding a plate that’s wide enough if you don’t want to see the hole poking out. Sorry for the late reply – we are just figuring out how to reply to comments!
Allie
How would you cover the gap?
Karen Franklin
Great very detailed instructions!
Leave a Reply
Subscribe
Recent Articles
- Have a broken lamp or chandelier? Hippo can help!
- There's been a rumor that we're closing - We're not!
- Removing Valves and Cartridges
- Time Keeps on Ticking
- Hippo Fixes Leaky Faucets
Tags
- antique (2)
- build (1)
- cartridges (1)
- clocks (1)
- faucet (1)
- fix lamps (1)
- greenhouse (1)
- kitchen (1)
- lamp repair (1)
- lighting (1)
- old (1)
- plumbing (1)
- portland (1)
- reuse (1)
- ul certified (1)
- valves (1)
- vintage (3)
- windows (1)
About Us

Hippo Hardware is an eclectic building salvage store specializing in hardware, lighting, architecture and plumbing from 1860-1960. We offer assorted collectibles, trinkets, whatnots, and whoziwhatsits depending on what we get in. The spirit of Hippo Hardware is to rejoice in the individual, the unique, and the original.
Hippo Hardware was officially established in 1976 after the founders Steven Miller and Stephen Oppenheim decided to turn a life of swashbuckling adventures into a second life of swashbuckling adventures. We live in the local, even for our customers far away. That means you will probably hear a story about burying a Porsche in a state park while you are asking about a faucet or meet Fred the shop dog while you're paying for a light fixture. We strongly support community projects, teachers, artists, adventurers, dreamers, and one-man-bands.
If you're looking for a hard to find hardware pattern or can't find the match to your lamp shade, we'd be happy to tell you if we have it, seen it, or know where you could get it.
To make sure you get what you need, we offer the following services:- Lighting and Lamp Repair - We have a fully UL certified lighting repair shop. We can repair and rewire most vintage or antique fixtures. You may want to call or e-mail if it's newer, but we can sometimes fix those too. Shop prices are $80/hour plus parts.
- Customizing - We do our best to make sure it looks just right. Our lighting shop can customize length, finishes, plating, and configuration. Our plumbing department will coordinate refinishing with local companies. The hardware department is able to darken, refinish, clean, and rebuild. Our services can vary depending on staff so please contact us with your project details.
- Returns - Accepted for any reason within 2 weeks of purchase. That means if it doesn't fit, if your sweetheart doesn't like it, if it doesn't match your paint scheme. Receipt required. Returned to you the way you paid and items MUST be in original packaging and condition. Defective or damaged items will not be eligible for a refund.
- If your items were shipped: Shipping refunded only in the case of defective items. Hippo does not refund original OR return shipping cost.
- Online shopping - Conveniently browse our online section of items! Please note: our online section is much smaller than our store selection, we do offer returns for online purchases but do not refund original shipping or provide return shipping. We ship on Wednesdays, Thursdays and Fridays.
- Trade in - Bring in what you have and we will offer you in store credit or cash. Email pictures first if you'd like to talk about it before you get here.
- Mortise lock repair - Hippo is the only hardware store in Portland that offers full mortise lock repair--including French Door mortises and closet mortises! Our repair shop can diagnose and repair your mortise lock or perhaps we have a replacement if a repair is not an option. Shop prices are $80/hour. Please call our store and ask for Colin to speak about your repair!
Hippo Hardware has three glorious floors and 30,000 sq feet of building salvage to explore. Our inventory, and staff, is divided into four departments: Hardware, Lighting, Plumbing, and Architecture. We do our best to highlight our inventory full of unique items and reproductions on our website, but most of our stock is not online yet. Please contact us if you're looking for something you don't see here.
We donate to: NARAL, Planned Parenthood, Portland Women's Crisis Line, Benson High School, Sunnyside Environmental School, Junk to Funk Recycled Fashion Show, SE Works, Vision Northwest, Multnomah Playschool, Union Gospel Mission, Community House, The Friendly House, Marylhurst Childhood Center, Portland Lions Club, Sabin Elementary School, Oya No Kai supporting the Japanese Magnet Program, Lee Owen Stone Preschool, Public Interest Law Project, Jefferson High School for the Performing Arts Theater Department, imago Theater, Reynolds High School, David Douglas High School, and Milagro Theater.


G$
November 27, 2021
Will, buy some used hardwood doors. The right doors can make your house look much more elegant. And feel elegant. Nobody likes a cheap door.